
All you need to know about cPHulk
- WHM/cPanel
- POP3/IMAP/SMTP connections including email clients and webmail
- FTP/SFTP, WebDisk
- SSH (cPHulk does not affect public key authentication)
- IP addresses from which too many failed login attempts were noticed (to a single or several services at the same time)
- accounts which are being actively abused by fail login attempts
- Temporary block – such block will expire after a specific amount of time set in the cPHulk configuration
- One-day block – will occur specifically for 24 hours once exceed a specific number of failed login attempts from a certain IP address
- Permanent block – will occur after triggering several temporary blocks. Can only be lifted manually.
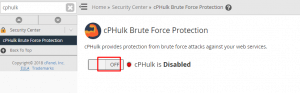
After activation, you will be able to adjust its configuration and monitor failed login activity.
cPHulk settings
In this tab you can change limits of fail login attempts and temporary blocks duration:

Whitelist/Blacklist management
For some reason, you may want to block certain IP addresses or whitelist them in order to avoid blocking. For these purposes, you can use Whitelist/Blacklist Management tabs in the cPHulk menu:
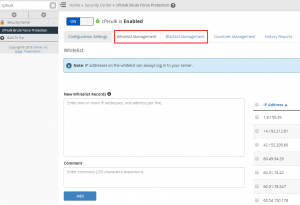
You can whitelist/blacklist multiple IP addresses at the same time or even specify full networks in the CIDR format.
NOTE: We recommend to whitelist your own IP address in order to avoid a lockout from the server.
cPHulk logs
cPHulk provides useful blocking logs for your convenience. There you can check which IP addresses/users were blocked and for which period:
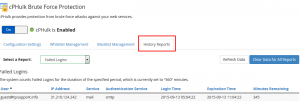
A raw explanation of the entry log shown at the screenshot above can be the following:
There were too many failed login attempts via the SMTP protocol to the [email protected] email account from some device with an external IP address 31.210.124.242. It led to a 360-minute block (such period of time is specified in the Configuration tab). The block was issued at 05:04.22 and will expire in 345 minutes from now (or specifically at 11:04:22).
With these logs, you can troubleshoot the cause of the blocks and, for example, if suspicious log entries were found, blacklist the abuser’s IP address.
In addition to cPHulk IP blocks, you can enable automated firewall IP blocks if you have installed. The firewall block will completely prohibit server access, which is the fundamental distinction between these blocks. Before allowing the automatic potential of lockout from your own server, make sure you whitelist your own IP address.
SSH can be used to control cPHulk from the command line interface as well. We also advise consulting the relevant cPanel handbook.
