What is CAPTCHA?
CAPTCHA is a powerful tool you may employ to stop automated bots, sometimes known as spambots, from using your contact forms to publish spam on your website. Each contact form that uses CAPTCHA protection shows an image with text on it. Before submitting the form, users must type the CAPTCHA text that is presented. Automated bots cannot use your forms to create spam since they are unable to read and write the text that is displayed in the CAPTCHA image.
There are two steps you need to complete to add CAPTCHA protection to your WordPress site:
- Install and activate a CAPTCHA plugin.
- Choose your CAPTCHA settings.
Note:
There are several CAPTCHA plugins available for WordPress. In this example, we’re using the SI CAPTCHA Anti-Spam plugin, but you are free to choose a different plugin. The procedure for installing, activating, and configuring another plugin may be different. Refer to the plugin’s documentation for more information.
Installing and Activating the CAPTCHA plugin
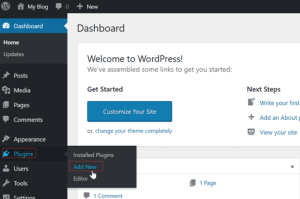
Firstly, Log in to your WordPress Dashboard as an admin. Click Plugins > Add New.
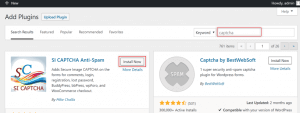
Secondly, In the Keyword search box, type captcha. In this example, we’re installing the SI CAPTCHA Anti-Spam plugin. Click Install Now. The Install Now button changes to Installing.
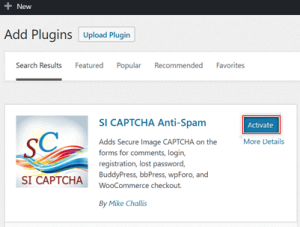
Thirdly, when the installation is complete, the button displays Activate. Click Activate.
Next, The plugin is now active and appears in the Installed Plugins list in your WordPress Dashboard.
Choosing & Changing Settings
Choosing Settings
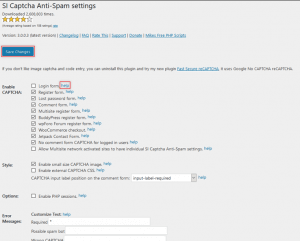
Now that the plugin is active, you can choose the types of forms that will be protected by CAPTCHA. You can also change the messages that are displayed with your CAPTCHA.
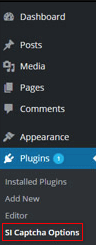
After that, In your WordPress Dashboard, click Plugins > Installed Plugins > SI Captcha Options.
After installing CAPTCHA, comment, registration, and missed password forms are automatically allowed. Since these are the most frequently targeted forms kinds of automated bots, we suggest that you leave these default settings in place.
There are two other default settings that you may want to change:
- Login form –
The login form does not automatically enable CAPTCHA protection. Since login forms require a valid username and password, they are usually not targeted by spambots and do not need protection from CAPTCHA. However, if you are concerned about brute force attacks on the login page or suspect that your site users’ usernames and passwords have been compromised, you can enable CAPTCHA on login forms for additional protection.
- No CAPTCHA remark for clients logged in –
This environment is automatically activated and implies that registered users of the website who are presently logged in and have entered their usernames and passwords effectively do not see a CAPTCHA on the submission form.. To maximize protection on your comment forms and require CAPTCHA for currently logged in users, disable this setting.
Changing Settings
Click Save Changes to select your form kinds and make any adjustments to the Options and Error Messages sections
Tip:
For more information about a setting, click help.