How to setup cpanel after getting a VPS Automation
Popular Linux-based web hosting control panel called cPanel. On a single Virtual Private Server (VPS) or dedicated server, it offers a graphical user interface that makes managing and hosting several websites simple. Using this programme, you may carry out a variety of operations (uploading files, producing emails, making cron jobs, managing databases, etc.).
Users can control their web hosting through the user-level access interface offered by cPanel. Users can manage settings pertaining to server administration and account management through the root and reseller level access interface provided by WHM (Web Host Manager).
With the cPanel license activated by our Engineer, you may proceed to update the IP in control panel for cPanel accounts.
Updating the IP address in the Control Panel
Follow the steps below to change the IP for the WHM/cPanel:
Firstly, log into the WHM panel using this address: https://new_server_ip:2087
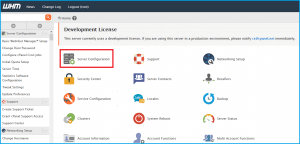
Secondly, go to Home >> Main >> Sever Configuration >> Basic cPanel and WHM setup menu and click on All Tab.
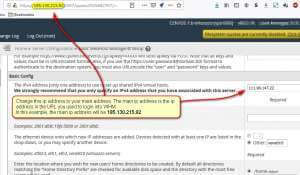
Next, set up the Shared Internet protocol virtual host using the ‘IP address‘ field. Enter the new Internet protocol address in the ‘Basic Config‘ section during the saving process.
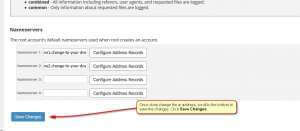
Then, scroll to the bottom and click on Save Changes.
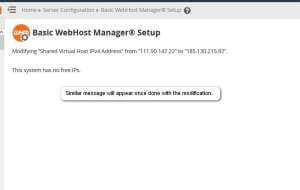
Lastly, WHM will proceed the modification and you are done with IP changes.