This article describes how to manually migrate emails using Ms Outlook.
There are 3 stages involved;
i. Configure email as POP3 ii. Export email data (PST/OST) iii. Import email data
Export and Backup OST/PST from Outlook Email Application
This is the easiest, straightforward and effortless way to export and backup Outlook Emails:
Firstly, open and log in on MS Outlook.
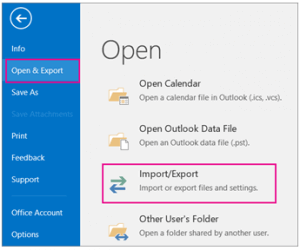
Then, go to File and click on Open and Export followed by Import/Export
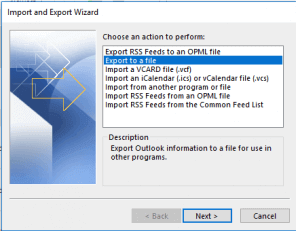
On Import and Export Wizard, click Export to a File and click Next.
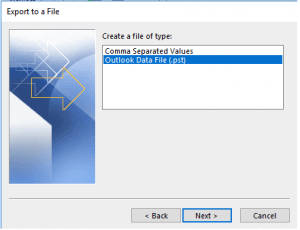
4. After that, select Outlook Data File (.pst). again click Next.
In case any dialog box appears to save on other location, click on Cancel button.
Lastly, type a name for Outlook backup. Click Finish.
Import the OST/PST to New Email account
You will need to remove and add the email account again in Outlook using your new hosting’s mailserver as Host:
Firstly, configure the email using the guide provided. NOTE: Kindly use new hosting’s mailserver or update the DNS of current mailserver to new server.
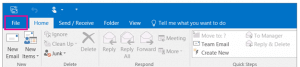
At the top of your Outlook ribbon, select File.
3. Select Open & Export > Import/Export. This starts the Import/Export wizard.
Select Import from another program or file, and then click Next.
Then, select elect Outlook Data File (.pst) and click Next.
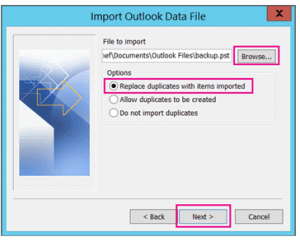
Browse to the .pst file you want to import. Under Options, choose how you want to deal with emails and contacts, then choose Next.
If you’re importing the contents of your .pst file into your mailbox, choose that mailbox here.
And if you’re NOT importing into your mailbox, choose Import items into the current folder. This imports the data into the folder currently selected.
Choose Finish. Outlook starts importing the contents of your .pst file immediately. When the progress box disappears, the import is finished.