
How to setup content filtering in SmarterMail
You might occasionally wish to take a specific action with regard to the emails you receive. For instance, you might want all emails coming from a particular person to go directly into a particular folder, or you might want emails with a specific phrase to be deleted or bounced.
The following crucial information should be taken into account when installing content filters:
- You must utilise IMAP settings in Outlook to move emails to a specified folder; otherwise, you will not receive those emails, as POP3 only downloads what is in your inbox. The filter will not be affected, but you will need to access your webmail to see those messages.
- If you filter emails based on words in the body or subject line, be aware that such words may not appear in future emails, especially if you opt to delete or send them to spam.
From emails they have not sent, certain mailboxes occasionally receive a lot of bounce backs. This is undoubtedly a hassle. These are frequently sent from external servers, but the return email is faked so that it is sent to someone else, such as you, so you receive bounce backs.
Please Follow these Instructions:
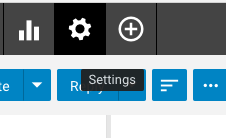
If the Settings icon isn’t visible, use the left navigation toolbar’s down arrow button to scroll down.
Step 1
First, open the Filtering options by clicking on the + sign, then choose Content Filtering.
Step 2
To continue, use the New option to add a new filter.
Step 3
Select the Next option after checking the From particular addresses checked.
Step 4
In the text field labelled “From specific addresses,” enter the email addresses you want to filter, and then click the Next button.
Step 5
Give this content filtering rule a name.
Step 6
Check the appropriate checkboxes to select an action or actions.
Step 7
Finally, click the Save button to save and create this filtering rule.
