
Add Your Heading Text Here
This article will show you how to connect Microsoft SQL 2000 Database by using Enterprise Manager. You can simply follow the guide below:
Step 1 of 9
Open the SQL Server Client Network Utility: Start > Programs > Microsoft SQL Server > Client Network Utility
Step 2 of 9
Click on the “Alias” tab
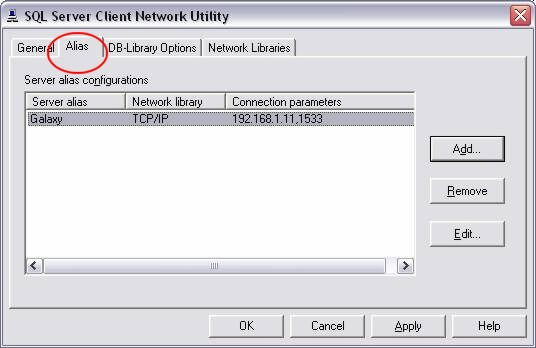
Step 3 of 9
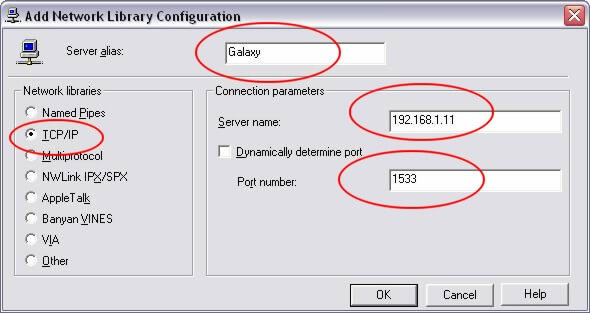
Click “Add” and enter the following information:
Server Alias – Galaxy (Your SQL Server Hostname)
Network Library – TCP/IP
Computer Name – 192.168.1.11 (Your SQL server IP, see Notes below)
Port Number – 1533
Step 4 of 9
Click OK
Step 5 of 9
Click OK – This will close out the Client Network Utility
Step 6 of 9
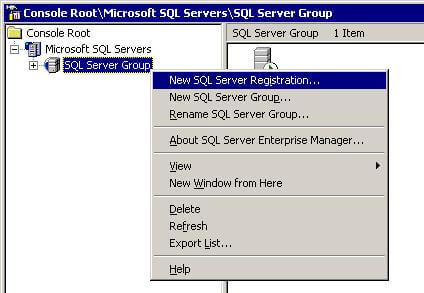
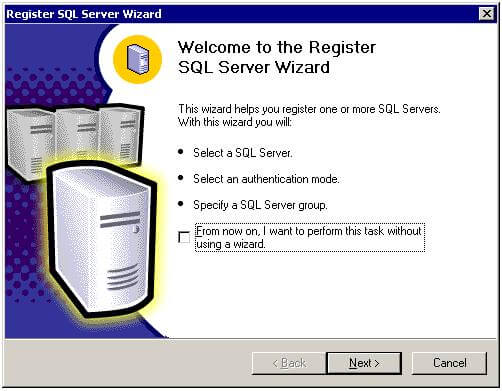
Open Enterprise Manager. Right Click “Microsoft SQL Servers” and select “New SQL Server Registration” This will open a wizard. Click Next.
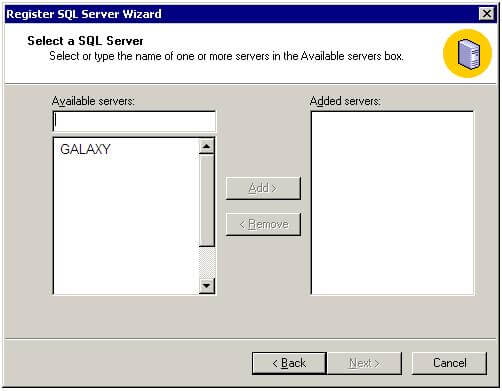
Step 7 of 9
Select “Galaxy” (SQL Server Hostname) from the list of available servers and “Add” it. Click Next.
Step 8 of 9
Choose to connect using SQL Server Authentication
Step 9 of 9
Enter your assigned username and password. Keep on clicking next until the wizard is completed.
Notes :
– You may obtain your SQL server IP after you have created your MSSQL database inside your HELM/DNP control panel.
– Please make sure you have SQL Service Pack 3 installed on your terminal.
– Please make sure your local firewall is not blocking Port 1533
– This article only applies to Windows 2003 hosting packages with MSSQL database support.
