A link to a website that offers goods or services is known as an affiliate link. You will receive a modest commission whenever a site visitor clicks on the affiliate link and makes a purchase on the affiliate site. Consider the scenario where you routinely blog about toasters on your WordPress website and you sign up for the affiliate programme of your preferred toaster retailer. You might add a link to the vendor’s website for every time the word “toaster” appears on your website. The merchant records your affiliate ID and gives you a commission for the sale when a customer hits the link and purchases a toaster.
Affiliate link plugins
You could manually add affiliate links in every post and page on your site, or you can use one of the popular automatic affiliate link plugins available for WordPress. Automatic affiliate link plugins convert every instance of specified keywords on your site into affiliate links, so you’ll never forget to add links or make typos in your links again. They can even add links to posts you’ve already published. In this article, you’ll learn how to install and use the ThirstyAffiliates and Pretty Links plugins.
Using the ThirstyAffiliates plugin
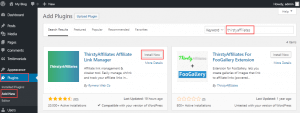
Firstly, to install ThirstyAffiliates, log in to your WordPress dashboard, and go to Plugins > Add New. Enter thirstyaffiliates in the search field. Find ThirstyAffiliates Affiliate Link Manager in the search results and click Install Now.
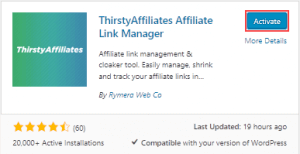
Then, click Activate.
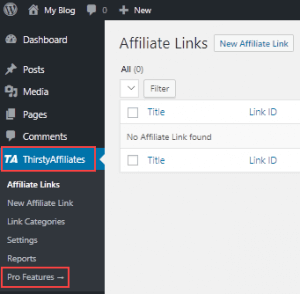
After that, to use automatic keyword linking, you’ll need to install the Pro add-on for ThirstAffiliates. Go to ThirstyAffiliates > Pro Features.
After you purchase the Pro add-on, you’ll receive instructions from the developer about how to install and activate the add-on. When the add-on is activated, go to Affiliate Links > Settings and scroll down to the Autolinker section. Enter your license key, email address, and set your autolinker options.
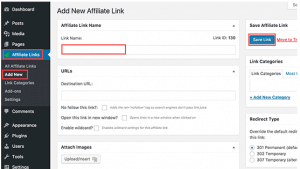
Next, you’ll add your affiliate links. Go to Affiliate Links > Add New. Enter the Link Name and Destination URL.
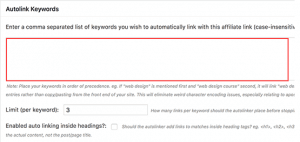
Then, Scroll down to the Autolink Keywords section. Enter the keywords you want to automatically link to the affiliate link. Separate each keyword with a comma. You can also specify a maximum number of links per keyword and choose whether to link keywords in headings. When you’re finished, click Save Link.
Using the Pretty Links Plugin
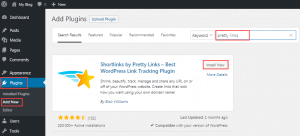
To install Pretty Links, log in to your WordPress dashboard and go to Plugins > Add New. Enter pretty links in the search field. Find Shortlinks by Pretty Links in the search results and click Install Now.
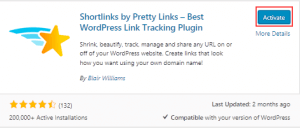
When the plugin is installed, click Activate.
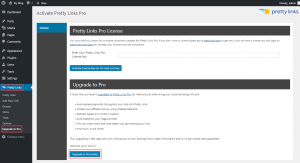
Next, go to Pretty Links > Upgrade to Pro. Click Upgrade to Pro today and follow the instructions to upgrade and activate your Pro license key.
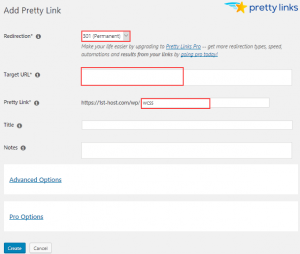
After that, you complete the upgrade to Pretty Links Pro, you’re ready to set up automatic keyword linking. Go to Pretty Links > Add New Link. Set the redirection type as 301 (Permanent) for all affiliate links. Enter the Target URL and Pretty Link, which is the link you want to use as the shortened URL.
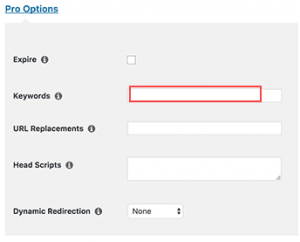
Click Pro Options and enter the keywords you want to automatically link. Separate each keyword with a comma. When you’re finished, click Create.
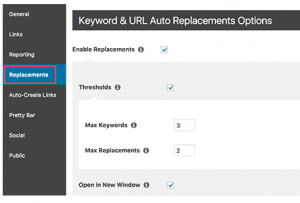
Now, go to Pretty Links > Options > Replacements. Select Enable Replacements and Thresholds. In Max Keywords, enter the maximum number of keywords that will be linked in the page or post. In Max Replacements, enter the maximum number of linked keywords in the page or post. Click Update.