
Google Analytics is a good tool for business growth and is completely free. Use it for your company website for a variety of purposes. First off, as was already indicated, there is no cost, therefore no need to pay with a credit card. Additionally, it offers real-time data and can provide hourly, daily, monthly, yearly, and year-over-year summaries. Additionally, you can monitor the trend over a predetermined period of time. It enables you to keep track of the periods when your potential clients are most active so that you may post your pages, promotions, or blog posts at the appropriate time to increase interest.
You can follow the steps listed below to begin using Google Analytics on your website:
Step-by-step guide
Step 1:
First, register for Google Analytics at www.google.com/analytics or log in to Google Analytics using your current Google account and password. If you don’t already have a Google Account, click Create an Account Now instead of Access Analytics.
Step 2:
You will next be needed to fill in your website address if this is your first time joining up. a username for your website, your nation, your time zone, and your contact details.
Step 3:
The Google Analytics user agreement will then be shown to you for reading and acceptance. before you may complete setting up a Google Analytics account.
Step 4:
The next step is to add a tracking code. You must copy and paste a string of HTML code known as the tracking code onto each page of your website that you want to track statistics for. You will be sent to the Overview page, which displays your website accounts, after logging in.
Step 5:
Select the desired account next, and then click Edit under the Actions column.
Step 6:
Click Check Status in the Main Website Profile Information box’s upper right corner. Your tracking code can be found under the “Instructions for adding tracking” section.
Step 7:
Copy the Javascript tracking code without making any changes after you have it for your property. Paste your tracking code snippet in the header of your website so that it shows up before the closure.
Step 8:
Return to the Overview page that displays your website accounts to confirm that Google Analytics will start collecting data from your website. Choose the desired account from the Actions column. Select Edit. Click Check Status in the Main Website Profile Information box’s upper right corner. You can check to see if your tracking code was correctly installed in the Tracking Status Information box.
Step 9:
Last but not least, give Google Analytics 24 hours to start collecting data from your website.
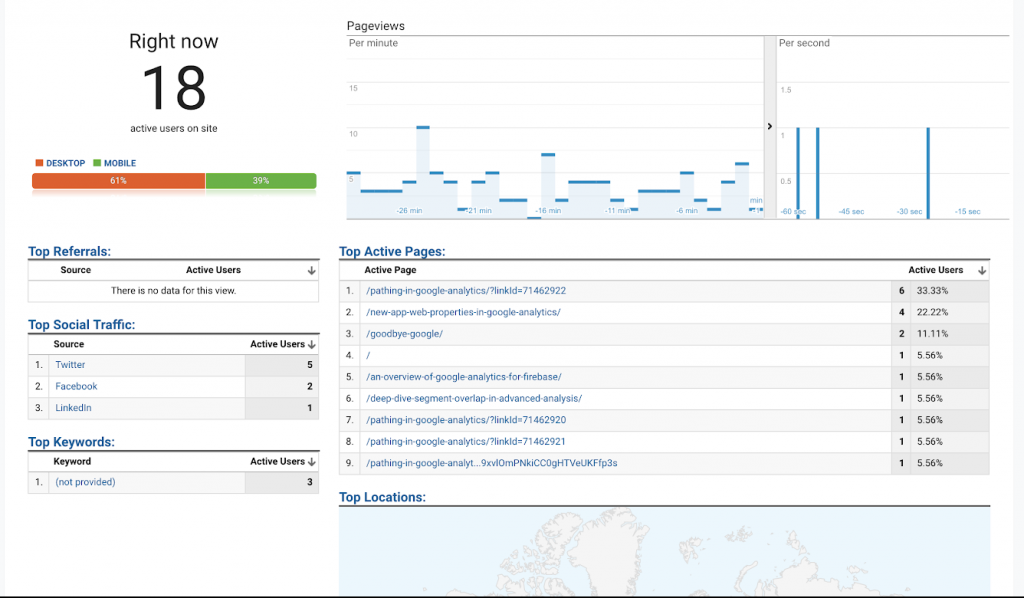
A sample of Google Analytics Report
