Setting Up Email for the Apple iPhone- iOS 13 & iOS 14
Please make sure you have your email address, password, and username before you begin. Additionally, before we begin, you must already have the internet setup.
Please refer to the instructions below to set up email on your iPhone running iOS 13 or iOS 14.
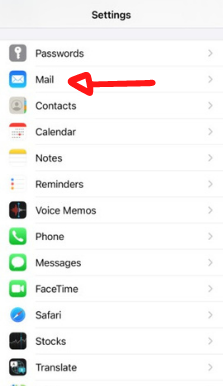
1. Firstly, select Settings.
2. Scroll down and tap Mail.
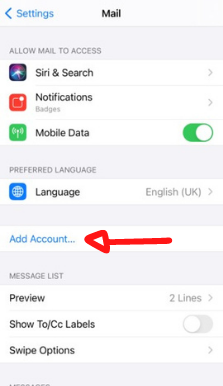
3. Tap “Add Account…“.
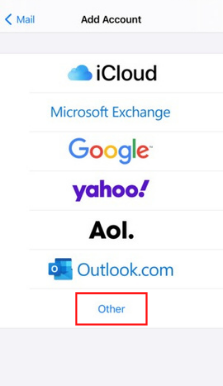
4. Followed by tapping Other.
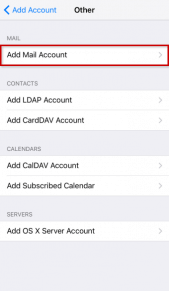
5. After entering into Add Account, tap Add Mail Account.
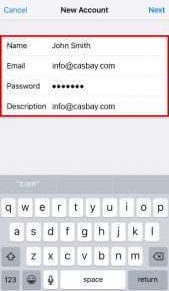
6. Enter the required informantion:
Name– will be visible to the sender
Email- the address you want to add, e.g. full email: [email protected]
Password– will be used to log in to Webmail
Description- as a name for the account on your device
(Note: the password is case-sensitive.)
Tap Next to proceed.
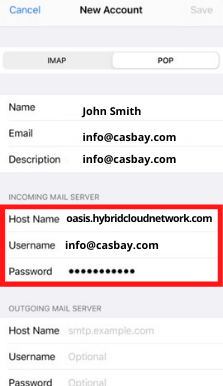
7. Selecting POP or IMAP is the following step. Please input the “INCOMING MAIL SERVER” email address.
Set “Host Name” to mail.yourdomain.com (or your server host name or server’s IP address)